


Web3 is an environment where control over assets and digital identity moves away from centralised services and into the hands of users themselves. MetaMask is one of the main tools for accessing this space. It has millions of active users and enables direct interaction with decentralised applications (DApps), NFT marketplaces, and blockchain-based financial services. MetaMask is available both as a browser extension and a mobile app, and it supports multiple networks.
In the following sections, we will cover how to install MetaMask, how to use it, and the key security tips you should know.

- Beyond storing assets, MetaMask is a gateway to a wide range of decentralised applications (dApps).
- This wallet lets you add and manage custom tokens on different blockchain networks.
- MetaMask supports several blockchains, including Ethereum, BNB Smart Chain, and Polygon.
- For stronger protection, you can connect MetaMask to hardware wallets such as Ledger and Trezor.
- MetaMask allows users to join blockchain-based games directly through their web browser.
What Is MetaMask and Why Should You Use It?
MetaMask is an Ethereum-based digital wallet that serves as your user identity in Web3. Unlike many wallets designed only to store tokens, MetaMask functions as an encrypted user profile. In practice, every action you take on decentralised networks, including:
- transactions,
- logins,
- connections,
- signatures
is carried out through MetaMask.
The core importance of using MetaMask is that, instead of relying on centralised user accounts, it defines your identity and ownership on the blockchain. This wallet allows you to enter the Web3 ecosystem without:
- Creating an account,
- Providing personal information, or
- Depending on a company’s central servers.
In short, MetaMask is not just a storage tool; it is the central hub of your interactions with the decentralised ecosystem. If you intend to use decentralised exchanges (DEXs), NFT projects, blockchain games, or DeFi protocols, MetaMask effectively acts as your “entry key” to this space. This is what sets it apart from many other wallets.
MetaMask is available both as a browser extension for web browsers (such as Chrome, Firefox, and others) and as a mobile application (Android and iOS). It serves as a primary access point to the Ethereum ecosystem and other blockchain networks.
According to the official MetaMask website, as of this article, the wallet has more than 30 million active users worldwide, underscoring its credibility and broad popularity.
Use Cases of the MetaMask Wallet
MetaMask is not just a tool for holding cryptocurrencies; it is also a gateway to the broader Web3 ecosystem. Its use cases can be summarised in four functional categories:
Asset Management on EVM-Based Networks
MetaMask allows you to hold, organise, and accurately view assets based on Ethereum and other EVM-compatible networks (EVM: Ethereum Virtual Machine). A key advantage is that the user can switch between networks, manually add token contracts, and manage the structure of their portfolio.
Executing Transactions and Controlling Technical Parameters
Every blockchain transaction requires setting parameters such as network fee or gas fee, gas limit, and the type of signature.
MetaMask lets the user adjust these parameters before sending a transaction, set the transaction speed, and track its status from start to finish.
Interacting with Decentralised Applications and Smart Contracts
When using decentralised applications (DApps), MetaMask acts as a technical bridge between the browser and the blockchain.
The wallet receives smart contract requests, displays them in a readable form for the user, and ultimately generates the required signature. Importantly, this process requires no account creation or user information storage.
Adding New Infrastructure
MetaMask supports multiple networks, but its standout capability is adding custom RPC endpoints.
Users can easily add new networks, testnets, or even private blockchains and use a single environment for development or testing.
Participating in Token Sales and ICOs
Using MetaMask, users can directly participate in Initial Coin Offerings (ICOs) or other token sales.
Receiving Airdrops
MetaMask is a primary tool for receiving free tokens (airdrops). Many blockchain projects distribute these tokens as rewards to their active users.
Voting in Decentralised Organisations (DAOs)
MetaMask users can take part in voting processes of Decentralised Autonomous Organisations (DAOs) and play a role in project-related decision-making.
Advantages and Limitations of the MetaMask Wallet
As one of the most widely used tools for accessing Web3, the MetaMask wallet comes with its own advantages and limitations. In this section, we examine them in a practical and precise way.
Advantages of MetaMask
The main advantages of MetaMask are:
- Security independence and removal of intermediaries
Since MetaMask is a non-custodial wallet and the private key is stored on the user’s device, asset management does not depend on any server, company, or user account. This security independence gives users greater control over protecting their capital. - Extensive integration with Web3 ecosystem tools
MetaMask is compatible with hardware wallets, EVM networks, browsers, and hundreds of decentralised platforms. This level of integration has turned it into a de facto standard in the DeFi space. - Free and open-source
Using MetaMask is completely free. In addition, its open-source code increases transparency and contributes to higher security. - User-friendly interface
MetaMask is designed so that even new users can use it easily, and installation and setup do not take long. - Support for multiple networks
In addition to Ethereum, the wallet supports other networks, including BNB Smart Chain (BSC), Polygon, and Avalanche, allowing users to manage assets across different blockchains. - Connection to hardware wallets
To further enhance security, users can connect MetaMask to hardware wallets such as Ledger and Trezor.
Limitations of MetaMask
The main drawbacks of MetaMask are:- Constant internet connection MetaMask is a “hot wallet”, meaning it is always connected to the internet. This constant connectivity can make it more vulnerable to online attacks compared to fully offline (cold) storage.
- Need for manual network configuration Although MetaMask supports popular networks, some newer blockchains are not added by default and must be configured manually.
- User-side security responsibility The security of assets depends on the user safely storing their seed phrase (recovery phrase). If this phrase is exposed to others, the funds are at risk. This is a user-error risk, not a technical weakness of MetaMask itself.
- Network fees Every transaction requires paying a network fee. During congestion on networks such as Ethereum, these fees can become very high and may not be economical for small transactions.
- Limited asset support MetaMask is originally designed for Ethereum and similar standards (such as ERC-20). As a result, it does not support certain cryptocurrencies that are not built on these standards.
- Feature differences on mobile Although the mobile version of MetaMask is functional, it may not offer all the capabilities of the browser (desktop) extension, especially when connecting to certain DApps.
Advantages and Security of MetaMask for Iranian Users
Due to international and banking restrictions, many Iranian users seek secure, reliable, and intermediary-free solutions for managing their digital assets. This section examines the key advantages and security considerations of MetaMask for Iranian users.
1. No Need for Identity Verification (KYC)
The biggest advantage of MetaMask for users in Iran is the absence of mandatory Know Your Customer (KYC) requirements. Many international exchanges block or freeze Iranian accounts due to sanctions.
MetaMask does not request any personal or identity information when creating or using a wallet. This ensures that the user’s identity remains fully protected.
2. Direct and Uninterrupted Access to Assets
MetaMask allows users to maintain complete, direct control over their assets.
Unlike centralised exchanges, which can freeze or restrict access to funds, MetaMask gives full authority only to the person who owns the private keys.
This level of control is especially valuable for users seeking full financial independence.
3. Support for Multiple Networks with Lower Fees
Since Ethereum transaction fees can sometimes be costly, users often look for alternative networks.
MetaMask allows users to easily add other networks to their wallet, enabling access to lower-fee blockchains for everyday transactions.
4. Ability to Use VPN for Greater Security and Access
Because Iranian users may face access restrictions or filtering when visiting the MetaMask website, using a VPN (Virtual Private Network) is essential.
A VPN not only ensures access to the website and browser extension but also improves the security of your internet connection.
How to Safely Download and Install the MetaMask Wallet
To start using MetaMask, you first need to install it securely in your browser or on your mobile device. Below is a step-by-step guide for each method.
Secure Download Guide for MetaMask on Chrome, Firefox, Brave, and Edge
Follow the steps below to install MetaMask on your browser:
Step 1: Visit the Official Website
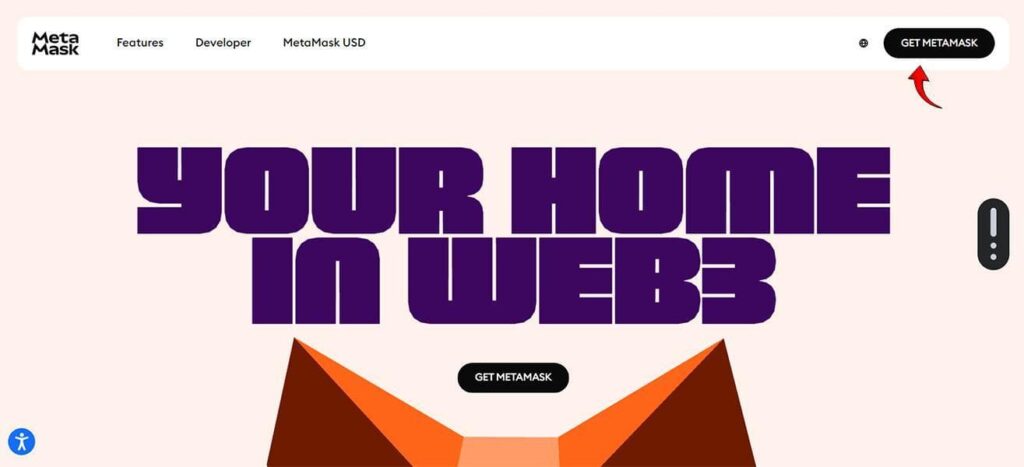
- Go to the official MetaMask website at metamask.io. (For security, always type the address manually or use trusted links.)
- Click on “Get MetaMask” to begin the download.
Step 2: Install the Extension
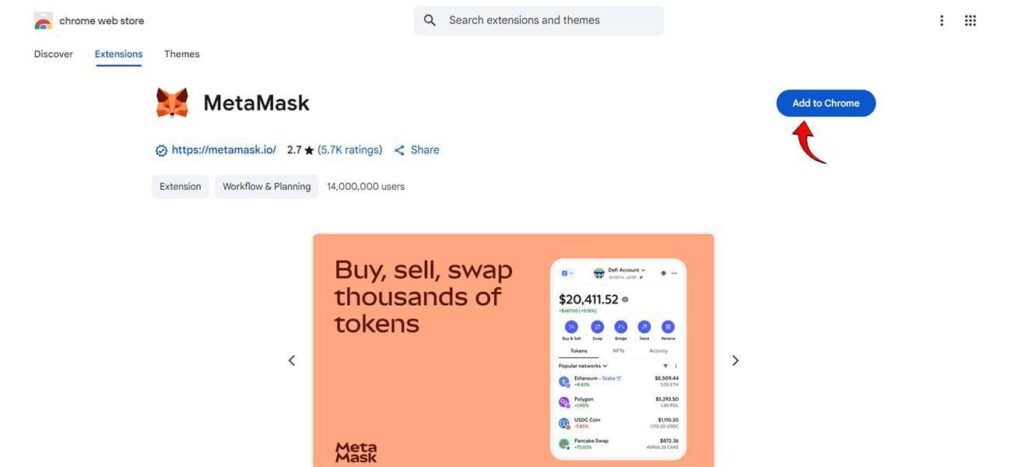
On the download page, MetaMask usually detects your browser automatically.
You will be redirected to the official extension page in the browser’s store (for example, the Chrome Web Store if you are using Chrome).
- Click “Add to Chrome” (or the equivalent button for your browser).
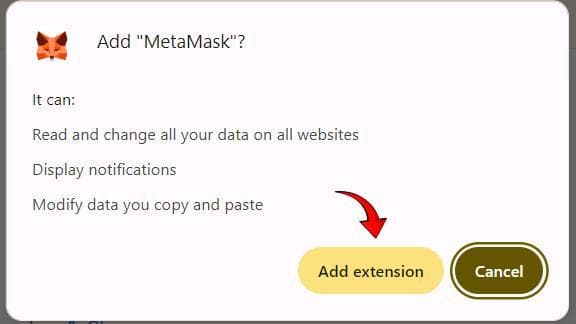
- In the pop-up window, confirm the extension’s permissions by selecting “Add extension.”
After Installation
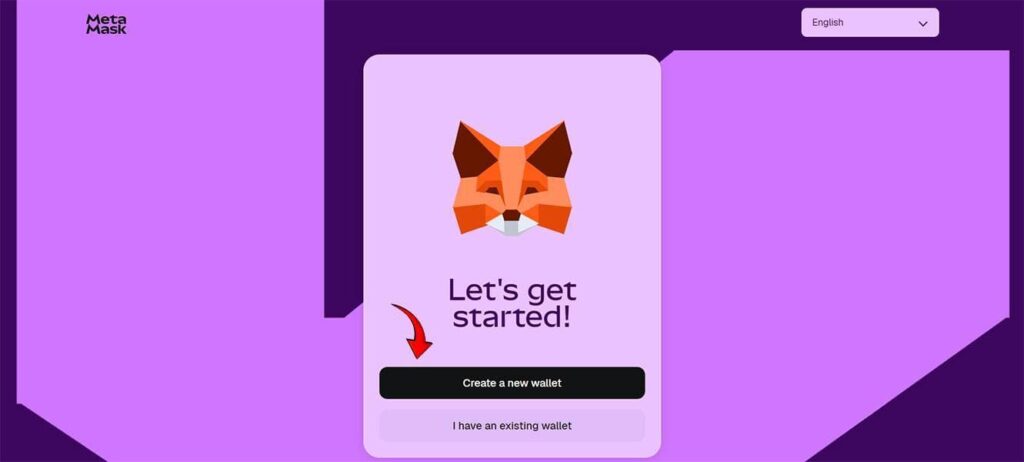
- Once the installation is complete, the MetaMask sign-up/login page will open automatically.
- On this page, you can begin creating your wallet by selecting “Create a New Wallet.”
Step-by-Step Guide to Installing MetaMask and Creating a New Wallet on Mobile
To install MetaMask on your mobile device, follow these steps:
1. Download and Install MetaMask
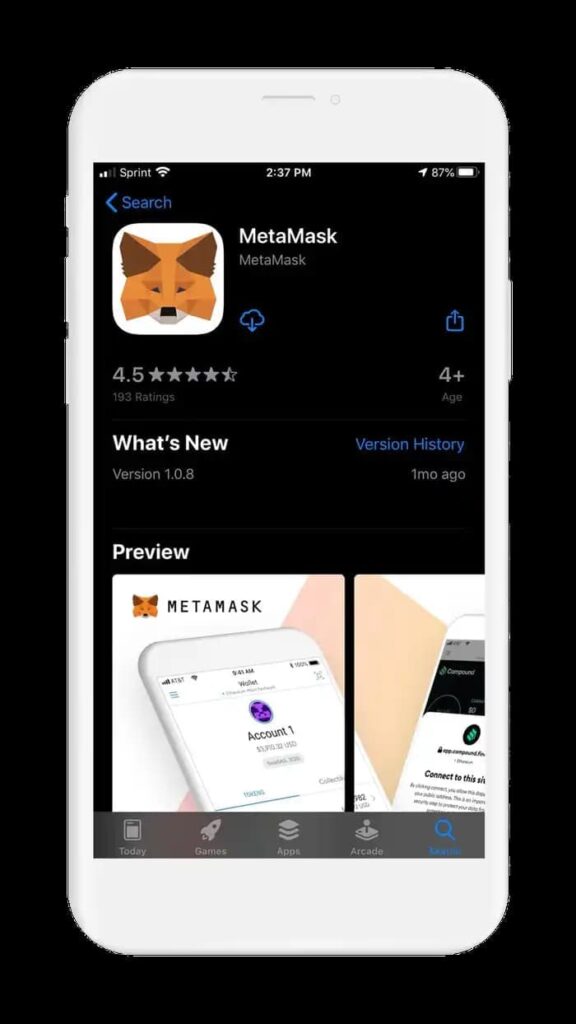
- Open the Play Store (Android) or App Store (iOS) on your mobile device.
- Search for “MetaMask”.
- Locate the official application, then download and install it.
2. Create a New Wallet in MetaMask
After installation, open the app to begin setting up your wallet.
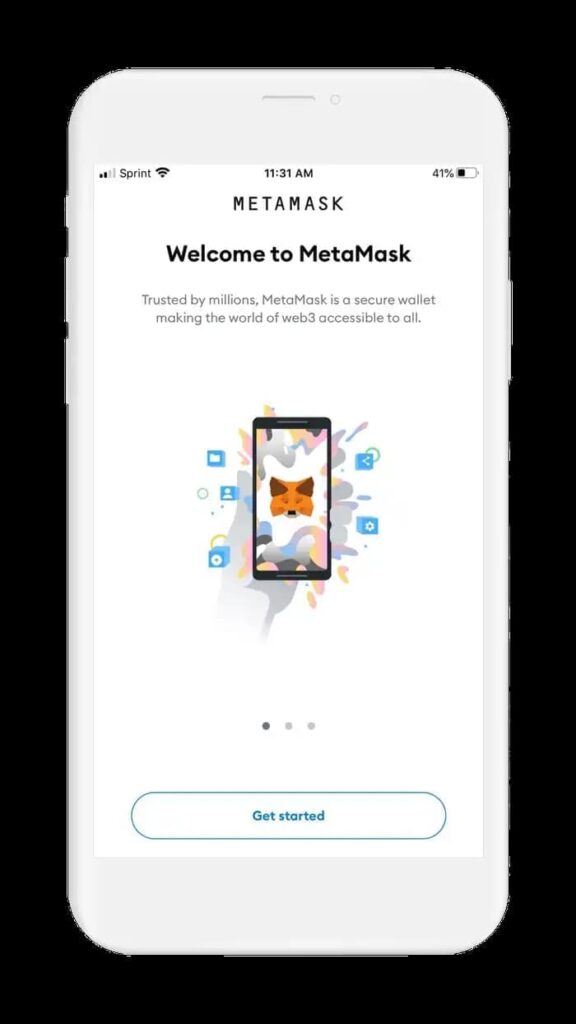
Start the setup process:
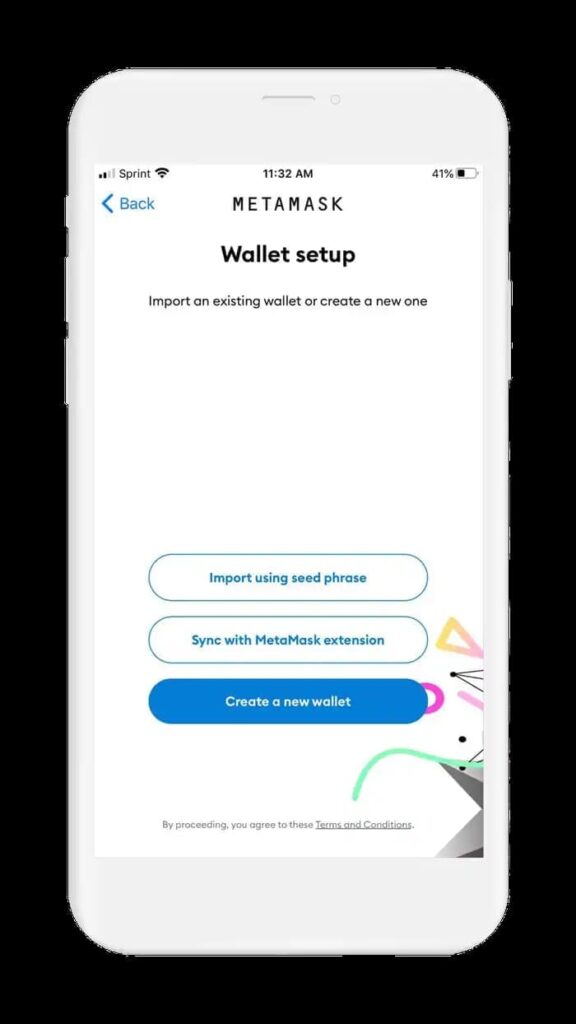
- Open the MetaMask app and tap “Get Started.”
- On the “Wallet Setup” page, select “Create a New Wallet.”
Create Your Password:
- Set a strong password for your wallet. (It’s recommended to use a mix of uppercase and lowercase letters, numbers, and symbols).
- Check the box to accept the terms.
- You may enable “Sign in with Biometrics” for easier access.
- When finished, tap “Create Password.”
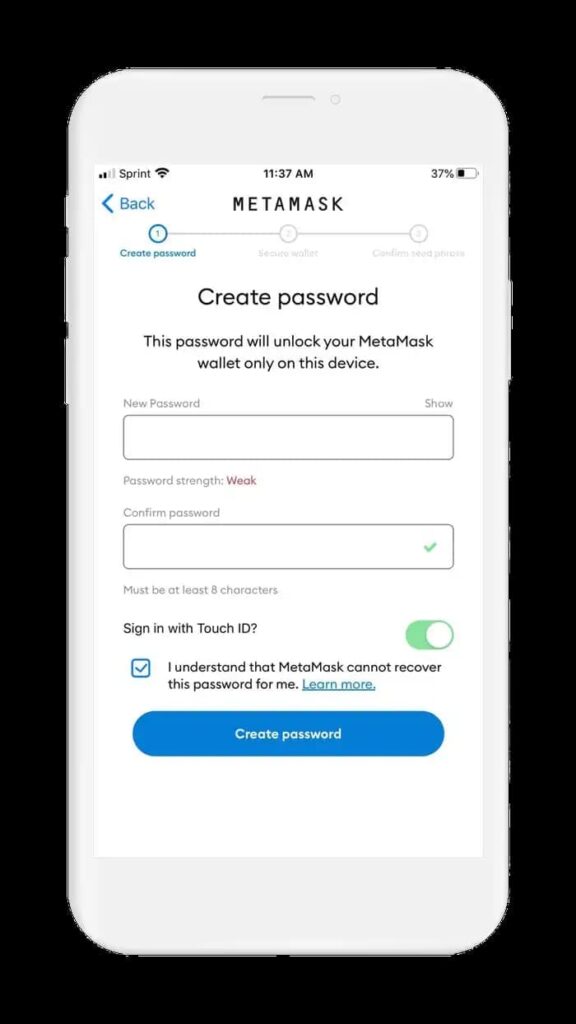

MetaMask cannot reset your password. If you forget it, you will only be able to recover your wallet using your Recovery Phrase (Seed Phrase), which you will receive in the next step.
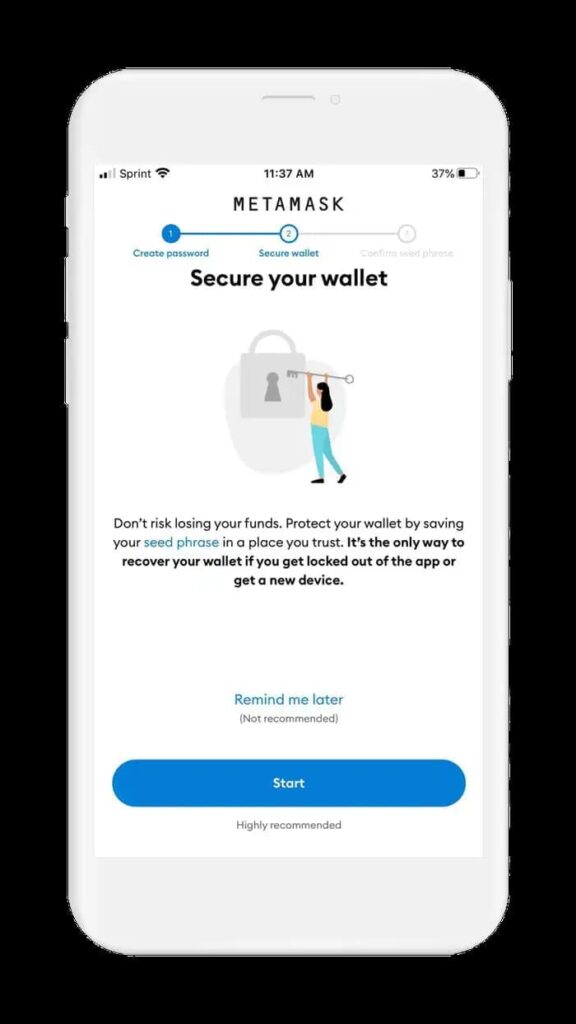
Securing Your Wallet (The Most Important Step):
After creating your password, you will be taken to the “Secure Your Wallet” page.
- Tap “Start”.
(Choosing “Remind me later” is strongly discouraged.) - The app will display warnings about the importance of the Recovery Phrase.
After reading them carefully, tap “Start” again.
Viewing and Saving Your Recovery Phrase (Seed Phrase):
- Tap “View” to reveal your 12-word Recovery Phrase.
- Your task: write down all 12 words in the exact order shown, on paper.
The sequence of the words is extremely important. - After carefully recording your phrase, tap “Continue.”
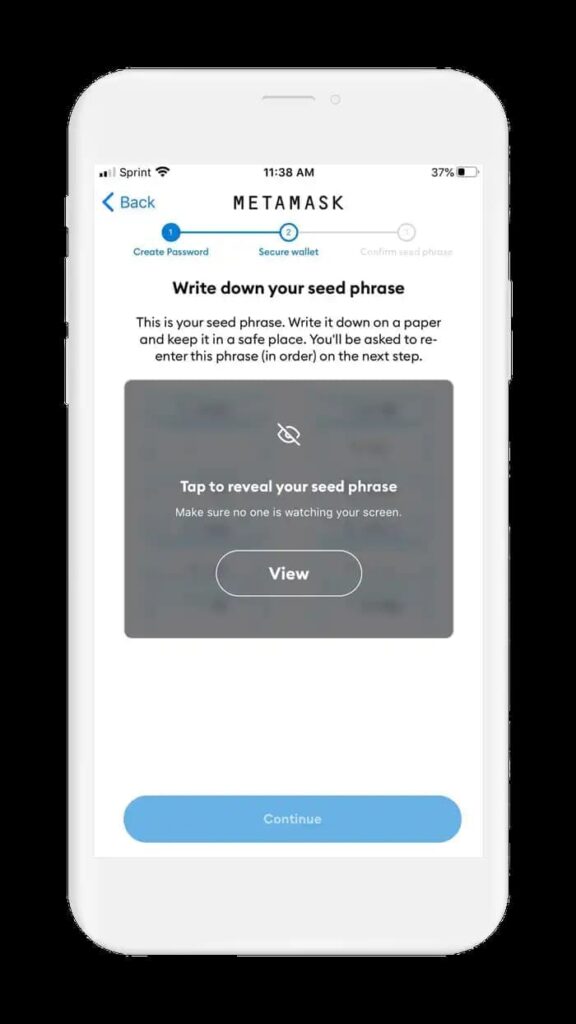
Warning:
Never take a screenshot of your Recovery Phrase, store it online, or send it to anyone.
Confirming the Recovery Phrase:
- At this stage, MetaMask will ask you to verify your Recovery Phrase.
- The app will display the same 12 words, but in a random order.
- You must tap the words in the exact sequence you wrote them down, so they appear in the correct order in the confirmation box.
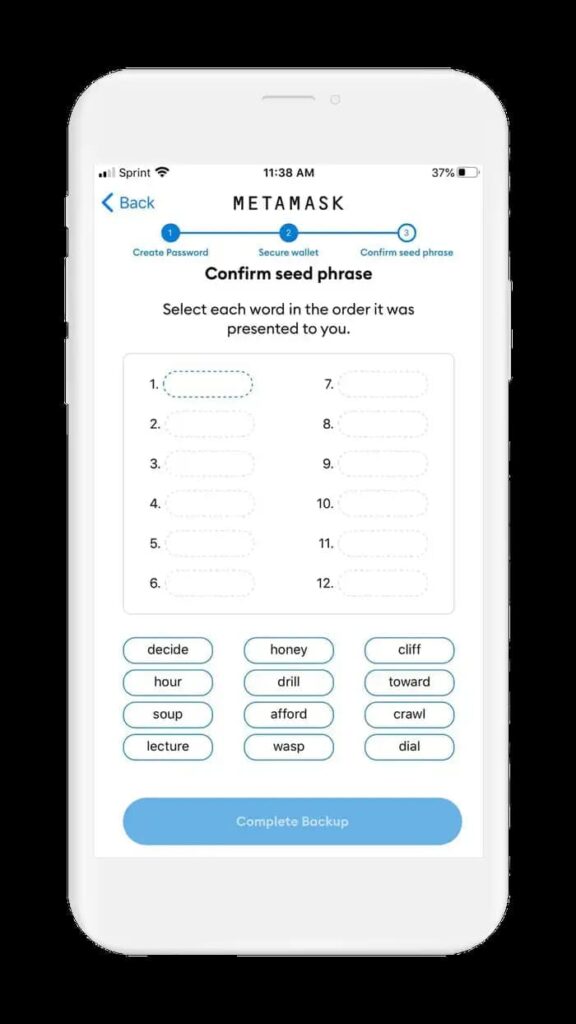
- After selecting all 12 words in the correct order, the “Complete Backup” button will become active. Tap it to proceed.

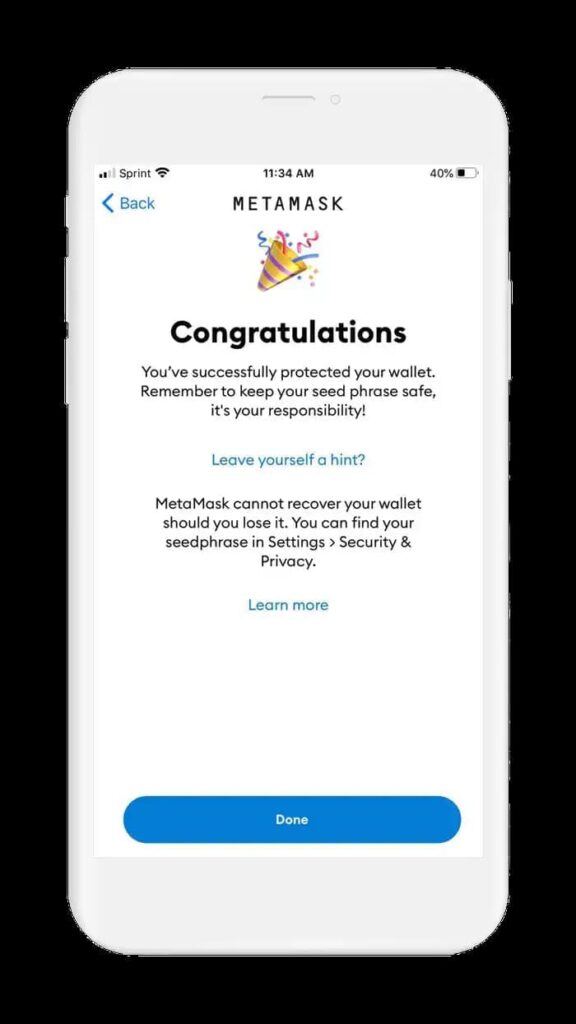
Completing Wallet Setup:
- You will see a confirmation message indicating that your wallet has been created successfully.
- Tap “Done.”
- Your MetaMask wallet is now fully set up and ready to use.
Step-by-Step Guide to Installing MetaMask and Creating a New Wallet on Desktop
At the time of writing this article, MetaMask installation on desktop is done exclusively through the browser extension.
MetaMask does not offer a standalone offline desktop application.
Beginner’s Guide to Using the MetaMask Wallet
In this guide, we walk through the essential steps and key features for using MetaMask effectively.
Sending and Receiving Cryptocurrency in MetaMask
Below is a step-by-step explanation of how to receive and send digital assets using your MetaMask wallet.
Receiving (Depositing) Cryptocurrency into MetaMask
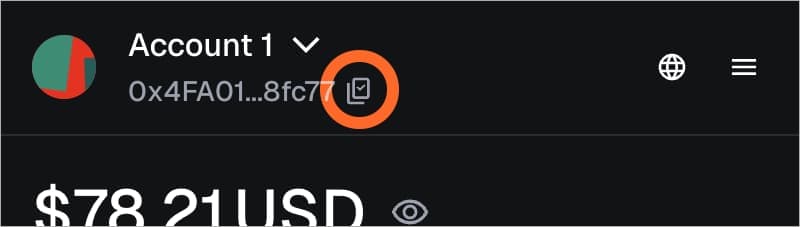
For example, to deposit Ethereum (ETH), ERC-20 tokens, or any asset on EVM-compatible networks from an exchange or another wallet, you only need your public wallet address.
- Open the MetaMask app.
- At the top of the main screen, you’ll see your wallet address (it usually starts with 0x).
- Tap the address to copy it automatically to your device’s clipboard.
- Go to the exchange or wallet from which you want to send the funds.
- Paste the address you copied into the “Recipient Address” field of that platform.
- Choose the amount you want to send and follow the steps to complete and submit the transaction.
Sending Cryptocurrency from MetaMask
The process is nearly identical whether you are sending ETH, ERC-20 tokens, or any other token on supported networks.
What You Need:
- Recipient’s wallet address:
The public address of the wallet you want to send funds to. - Sufficient token balance:
You must have enough of the specific token you intend to send. - Balance for network fees (Gas Fee):
You must hold the native token of that network to pay the transaction fee
(e.g., ETH for Ethereum, BNB for BNB Smart Chain).
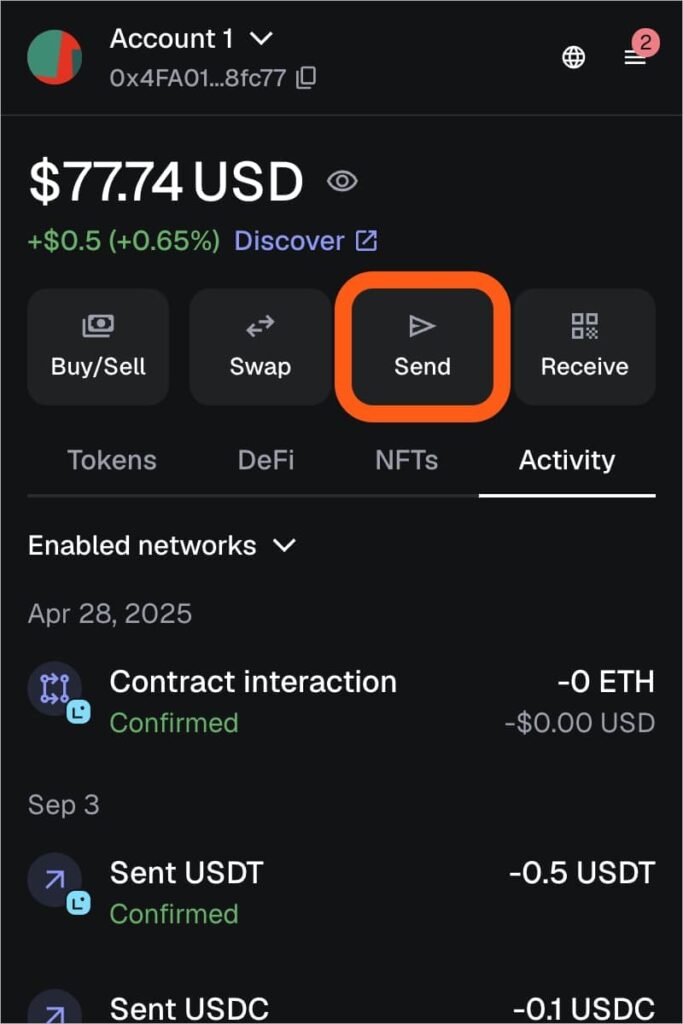
Step-by-Step Sending Process:
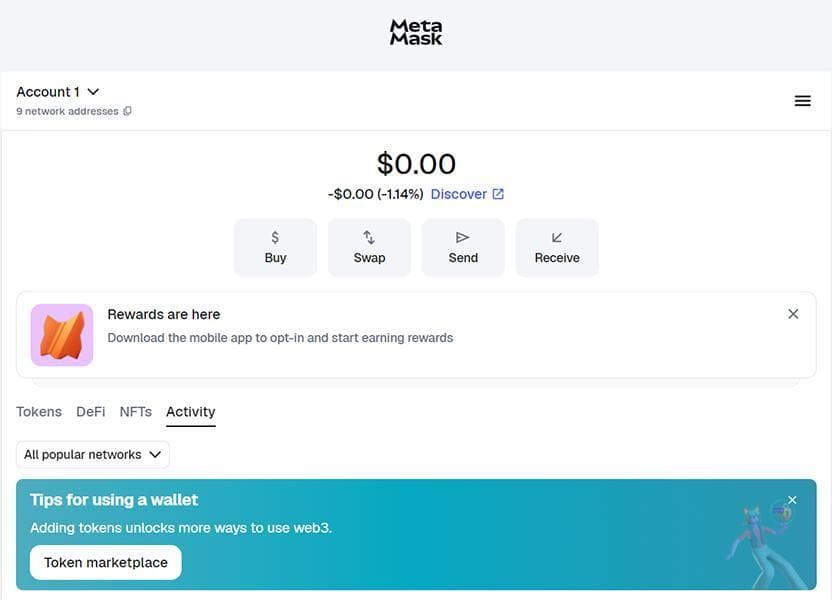
From the MetaMask main screen, make sure you are on the correct account, then tap the “Send” button in the centre of the screen.
- Now enter the recipient’s public address (you can simply paste it).

- Enter the amount of the token you want to send, then tap “Next.”
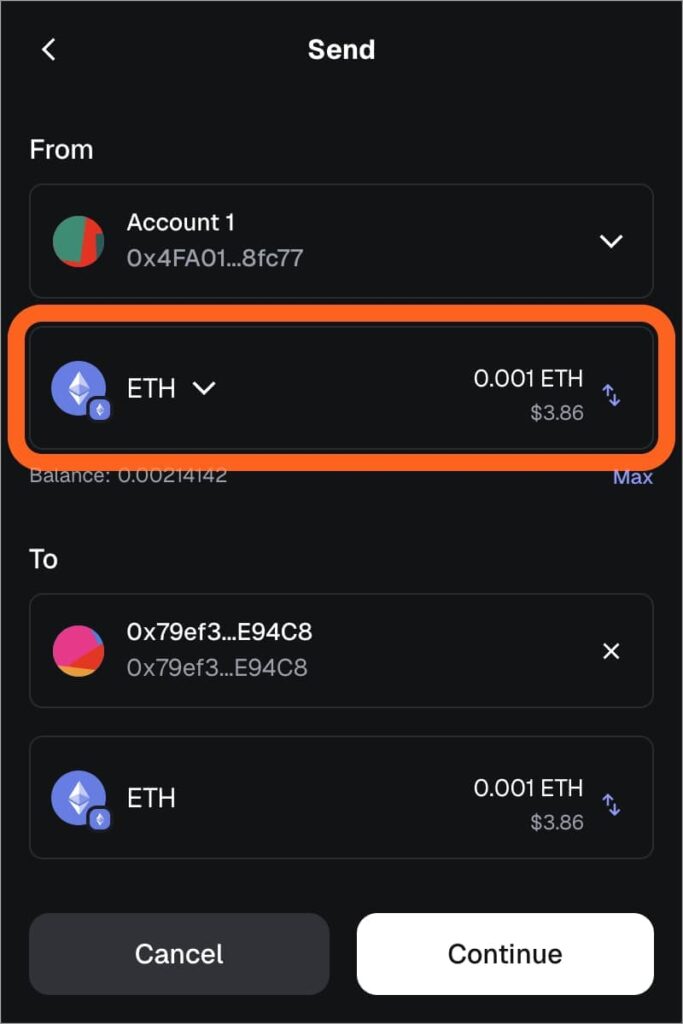
- On the next screen, you will see the estimated network fee displayed. (In some cases, you can adjust this fee manually.)
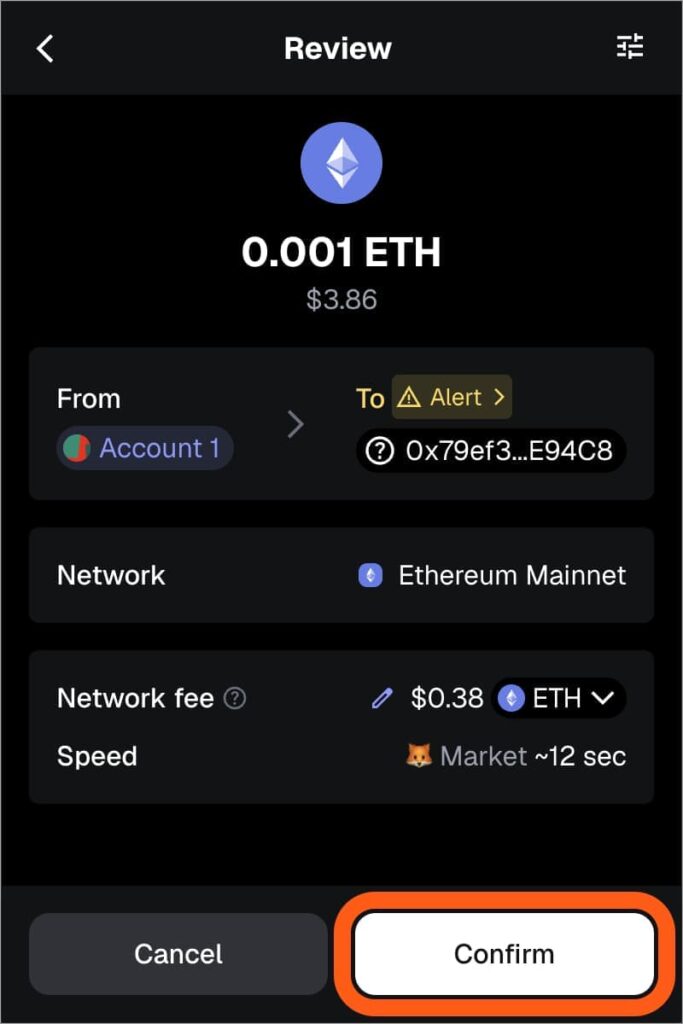
Before clicking “Confirm,” double-check the recipient’s address carefully to ensure it is correct.
- After confirming, your transaction will be sent. You will be redirected to the main screen, where you can view the transaction status under the “Activity” tab.
Adding Blockchain Networks and Using Multiple Networks
MetaMask is not limited to the Ethereum network. You can easily add other blockchains that are compatible with the Ethereum Virtual Machine (EVM-compatible) and use them within your wallet.
Adding a Network Through a Block Explorer
- The easiest way to add a network is by visiting its official block explorer (for example, Polygonscan.com for Polygon).
- Most of these websites provide an “Add Network” button at the bottom of the page.
- When you click it, MetaMask will automatically receive the correct network details and ask for your approval.
Adding a Network Manually
- You can also add networks manually:
- On the MetaMask main screen, click “All Popular Networks.”
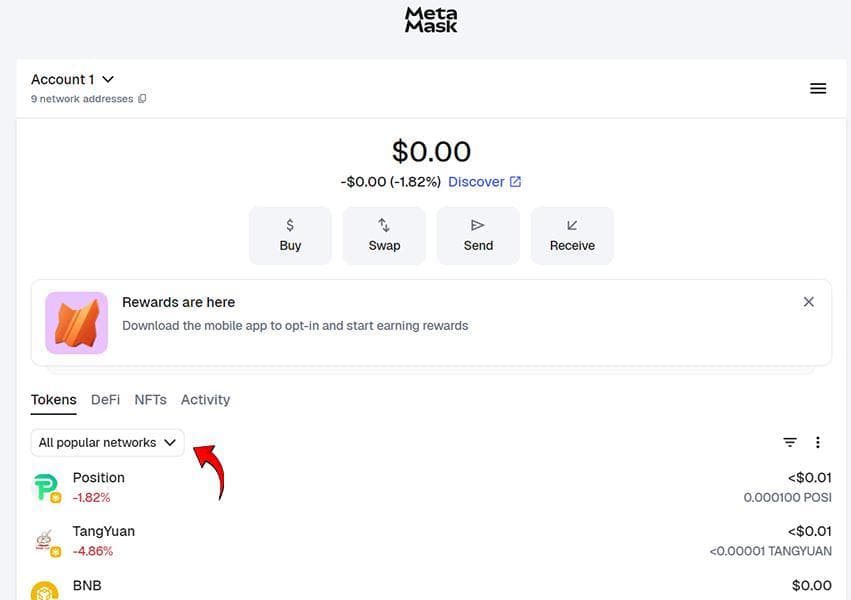
- In the window that appears, click “Custom” and then select “+ Add custom network.”
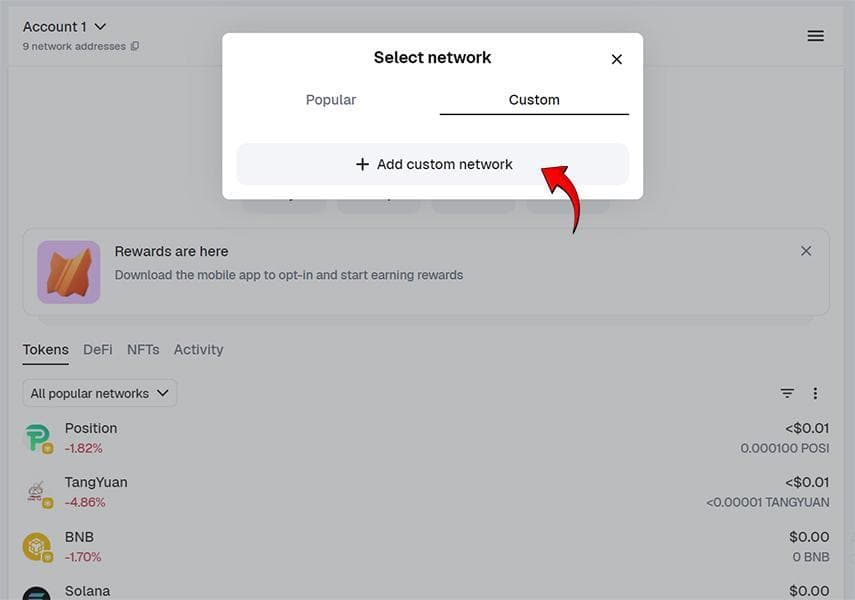
- In the “Add Network” form, fill in the following fields with the exact network information:
- Network name
- Default RPC URL
- Chain ID
- Currency symbol
- Block explorer URL
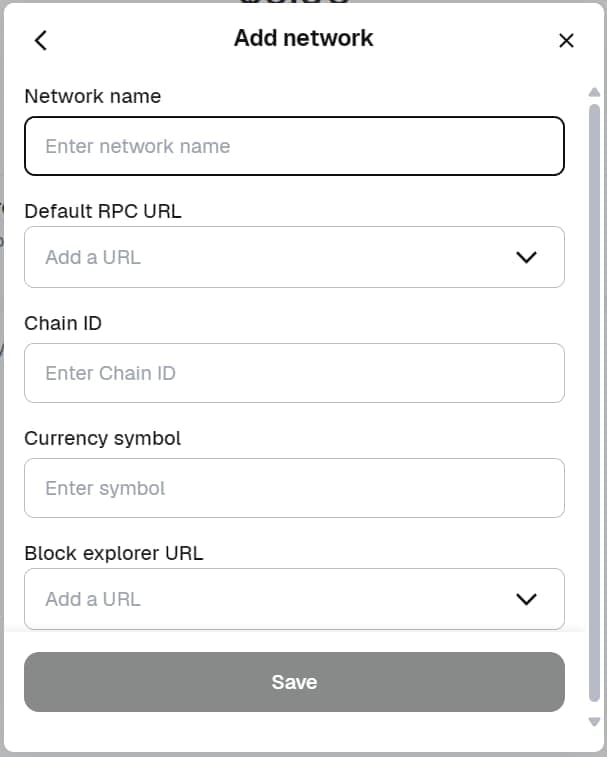
- Click “Save.”
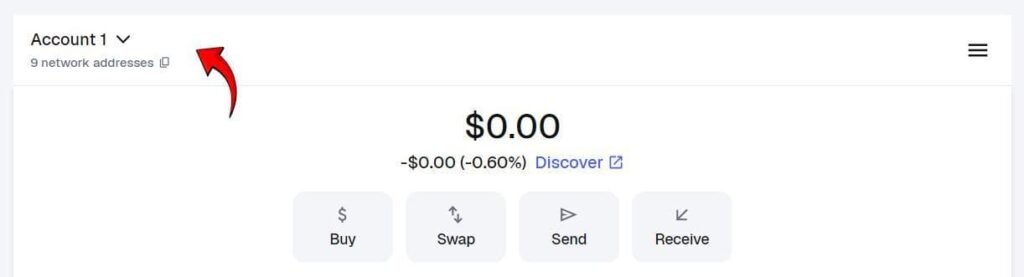
Using and Switching Networks: After adding a network, you can easily switch between them by clicking the current network name at the top of the main wallet screen. A list of all added networks will appear, and you can select the one you want to use.

Connecting MetaMask to Applications, Exchanges, and DApps
One of MetaMask’s core features is its ability to connect to decentralised applications (DApps), exchanges, and various platforms. This connection allows you to interact with these services directly through your wallet.
Steps to Connect:
- Find the Connect Button:
On the website or application you want to use, look for a button such as “Connect” or “Connect Wallet” and click it. - Select MetaMask:
You will be asked to choose your wallet. Select MetaMask. - Approve the Connection in MetaMask:
A pop-up window will appear inside MetaMask asking whether you want to connect.
This window shows the account that the DApp is requesting access to. - Managing Access Permissions:
Edit accounts: By clicking this option, you can choose exactly which of your MetaMask accounts will be connected to the application.
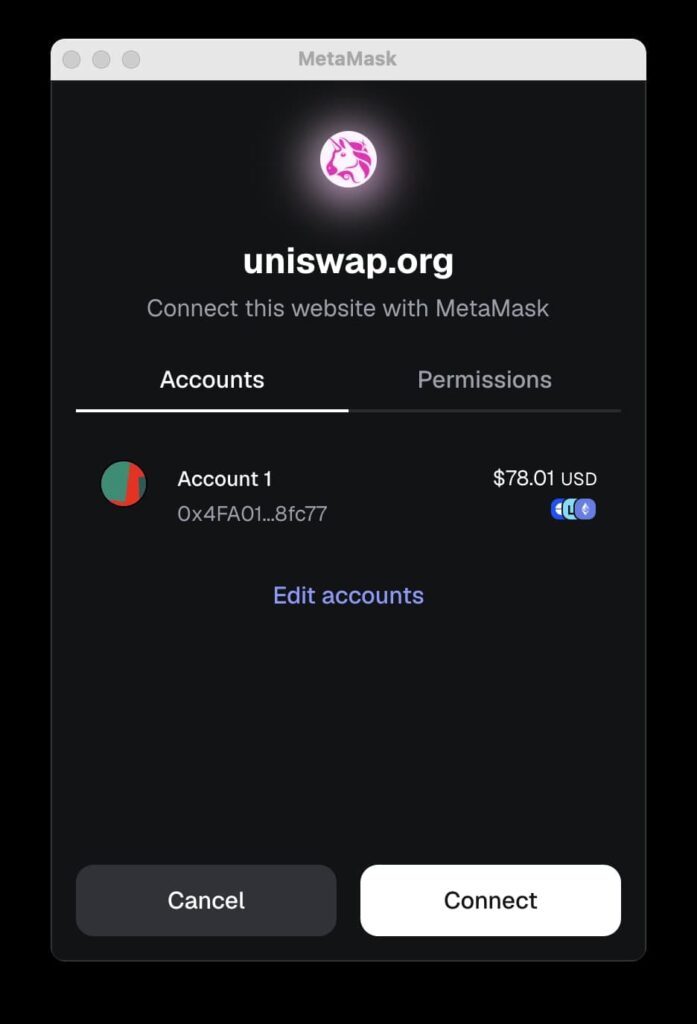
Permissions: In this section, you can see which accounts and networks you are granting access to. You can edit and manage these permissions as needed.
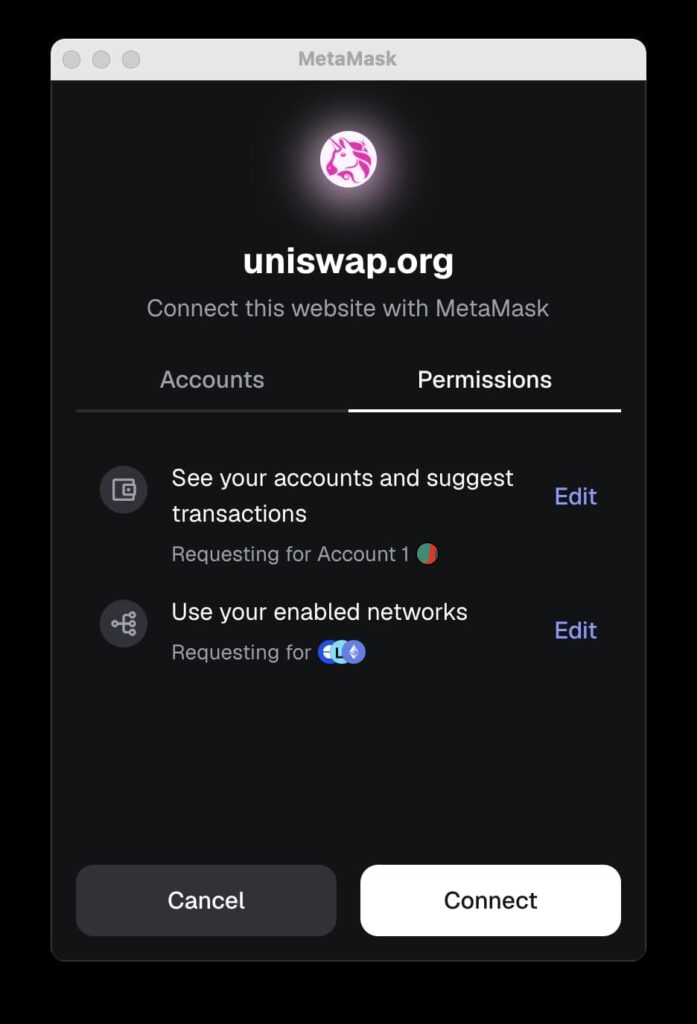
Final Review and Connecting
Security: You must manually approve every transaction inside MetaMask.
No action will be executed without your explicit confirmation.
If everything looks correct, click “Connect” in the MetaMask pop-up. Your wallet is now connected.
If you grant a DApp access to multiple networks, the application can automatically switch between your active networks without requiring you to change the network manually each time.
Essential Security Tips to Protect Your MetaMask Wallet
Following the security guidelines below is crucial for preventing unauthorised access and safeguarding your assets in MetaMask.
How to Keep Your Recovery Phrase and Private Key Secure
To protect your MetaMask Recovery Phrase and private key safely, follow these steps:
- Offline Storage
Never store your Recovery Phrase online (email, notes apps, cloud storage). The safest method is to write it down on paper and keep it in a secure, offline physical location. - Multiple Backups
It is recommended to create several physical backups of your Recovery Phrase and store them in separate secure places—known only to you. - No Sharing
Never share your Recovery Phrase with anyone under any circumstances.
Remember: MetaMask’s official support team or any legitimate organisation will never ask for your Recovery Phrase.
Detecting Fake Websites and Avoiding Phishing Scams
Pay close attention to the following to avoid phishing attacks and fraudulent websites:
- Carefully Check the URL
Always double-check the website address you are connecting to. Scammers often use URLs that look similar to the official one (metamask.io) but contain small differences.
- Use Security Extensions
Some browser extensions can help identify fake websites. (Important: Ensure the security extension itself is reputable.)
- Avoid Suspicious Links
Never click on links received through unknown emails, private messages on social media, or untrusted websites.
Updating and Using Official Versions of MetaMask
When updating MetaMask, keep the following in mind:
- Use the Latest Version
Ensure your MetaMask extension or app is always updated to the latest version. Updates often include critical security patches.
- Download Only from Official Sources
Download and install MetaMask exclusively from its official website (metamask.io) or from trusted app stores such as the official Chrome Web Store or Apple App Store.
Why Is MetaMask the Best Option for Starting with Web3?
MetaMask is considered a strong entry point into the Web3 world thanks to its simplicity, security, and broad support for multiple networks and decentralised applications (DApps).
This wallet allows users to interact with DApps and manage their assets easily, without needing complex technical knowledge.
In addition, MetaMask gives users full control over their assets. According to information from the official MetaMask website, the wallet is continuously being developed, with new features added regularly to improve the user experience.
Conclusion
For many users, MetaMask is the starting point for interacting with Web3, because it both simplifies asset management and enables direct connection to decentralised applications. At the same time, because it is a non-custodial wallet, the responsibility for security lies entirely with the user.
If the Recovery Phrase is stored properly and the user remains cautious when connecting to websites and applications, MetaMask can be a reliable, flexible, and suitable tool for operating across different blockchain networks. With ongoing development and expanding support for new networks and DApps, MetaMask is likely to remain one of the main gateways into the decentralised economy.